Showing posts with label Diet. Show all posts

Wednesday, April 18, 2012

Sticky Chicken

I had a great weekend, I went with my daughter on a mother daughter camping trip and had a blast! For the first time in a very long time, I felt comfortable in my own skin. I wasn't ashamed of how I looked, I had more energy than I think I have ever had. I even participated in a relay race on the beach which included doing crab crawls for about 100 feet and thanks to Jenna I kicked booty at those crab crawls. Boy was my back and shoulders sore the next day though. We had a blast and the weather was great but not much cooking happened other than things I have previously posted so I apologize for my absence here.  I am back though and today's recipe is worth the wait, it is so yummy!

Today's recipe is inspired by traditional sticky chicken which is usually made by marinating chicken in soy sauce, garlic, ginger and lots of sugar. I decided to make a version that is much more healthful by using Medjool dates in place of the sweetener and subbing in Bragg's Amino's for part of the soy sauce to limit the amount of sodium in the dish. While the chicken wasn't technically sticky, the flavor was out of this world good and would make for some great shish-kabobs on the barbeque this summer. I just baked mine in the oven and served along side some coconut cauliflower "rice" and stir-fried vegetables. I will share how to make the coconut cauliflower "rice" tomorrow.

Sticky Chicken (Serves 4-5)
4-5 boneless skinless chicken breasts totaling about 20 ounces
2 tbsp. minced garlic
2 tbsp. minced ginger
2 tbsp. tomato paste
2 tbsp. balsamic vinegar
2 tbsp. soy sauce
2 tbsp. Bragg's Amino Acid
3 Medjool Dates

Method
Start by putting your dates in a little warm water to help soften and re-hydrate. Set aside for about 15 minutes while you cut your chicken.
Next, clean your chicken and cut it into strips, or leave it whole, it doesn't really matter. I cut mine in strips intending to put it on skewers for kabobs but then got lazy and just threw them in the oven.

After the chicken is cut, you are going to make the marinade. Take the dates that have been softening and remove the pit, then add them to your blender along with a couple tablespoons of the water they were soaking in and blend them up until a paste is formed.


To a bowl, add the garlic, ginger, tomato paste, date paste, soy sauce, Bragg's and balsamic vinegar. Stir to combine.
Add in your chicken and stir to coat, making sure all pieces and all sides are covered in marinade.

Marinate in your refrigerator any where from 2 to 8 hours. I let mine sit for about 3 hours and it was super flavorful and yummy.
Ideally these would be grilled but if you are lazy like me, go a head and bake them in the oven at 375 degrees for about 20 minutes or until they are cooked through. If your chicken is thicker than mine it will take more time, if it is thinner it will take less.

Serve with your favorite sides and Enjoy!

Tuesday, April 10, 2012

Finished with Phase 3, Now What?

I officially finished Phase 3 of the PINK Method on Saturday but the busy weekend got in the way and I didn't get around to taking pictures until yesterday which marks officially following the plan for 90 days. Over all I did very well the last 90 days, in total I have lost 36 pounds and 25 inches. I really wanted to hit that 40 pound mark but Phase 3 proved to be a difficult time for me. No, not because of the eating plan or the workout routines, but because of life. Yes, life got to be very stressful the last few weeks, not to throw a pity party for myself but my son got very ill and we spend days upon days going from hospital to hospital and doctor's appointment to doctor's appointment. In the mix of it all I also injured myself which really limited the amount of exercising I could do. We also are in the process of buying an investment property and let's just say  it has been a process which equals stress. 


Before Reset
After Reset
After Phase 1
After Phase 2
After Phase 3
Total loss
Waist
48 inches
45 inches
41.5 inches
40 inches
38 inches
10 inches
Bust
47 inches
45 inches
42 inches
41 inches
40 inches
7 inches
Hips
45 inches
44 inches
41.5 inches
41 inches
41 inches
4 inches
Thigh
27 inches
26 inches
25 inches
23 inches
23 inches
4 inches
Totals
167 inches
160 inches
150 inches
145 inches
142 inches
25 inches


While I was quite disappointed that I didn't hit that goal of losing 40 pounds I came to the realization that not meeting that goal should not be something I beat myself up about. Why? I realized that my old self, my prior to PINK self would have buried the stress of the last 3 weeks with food. Instead I dealt with the stress, asked for help when I needed it and stuck to the plan. While my weight loss wasn't what I had hoped for, it was still a loss. So while I may not be able to celebrate losing a full 40 pounds in 90 days, I got darn close so not only am I going to celebrate that, I am going to celebrate that I have turned a corner and no longer need to turn to food to cope with life's ups and downs. 
My husband took this picture a few weeks ago without me knowing, I look at it and am amazed at the transformation, I look forward to what I will look like when I finish the next 90 days on PINK.

So what's next? I am not done with PINK...I am still considered obese. When I started I set an ultimate goal of getting back to my weight prior to having kids so I still have about 24 pounds to go but even then I will still be considered overweight. In order to get into a healthy weight range and have my BMI considered normal or "healthy" I need to lose approximately 43 more pounds. I will get there eventually but first I will strive to reach my first goal which was to lose 60 pounds.  I am going to continue the eating plan, going through the phases again but I plan on upping the weights I use when I workout. I went through the first 90 days using 5 lb. weights I plan to go up to 8 pound weights and do the whole workout cycle again. I hopefully will be subbing in some running instead of some of the Kardio workouts because I am supposed to run a 12K race in May if I can get my injury to heal enough to start running the distances and hills required for training but that is the only change I may make to the program.

The PINK program has allowed me to find myself again and for that I will be eternally thankful. 


Monday, April 9, 2012

Beef and Broccoli Stir-fry

This meal was a treat for most of my family. Why? You ask, well we don't generally eat beef in our house. My husband's body just doesn't process it very well so he doesn't eat it. I am not a fan of making several different meals so we have just gotten use to not having beef. I however love beef so once or twice a year when I find it on sale I will make something with beef which is a treat for myself and my kiddos. This beef and broccoli was a hit with my family and much to my dismay there wasn't a morsel leftover for my lunch the next day because my kids all had seconds. I know I shouldn't complain that it was all gone because that means my kids ate a really healthy meal full of vegetables but man was I looking forward to having some for lunch the next day. For the kids, I served this over Yakisoba noodles, for myself since I was on reset, I served it over cauliflower "rice" but you could also serve over brown rice if you are in the primary phase. Give it a try, it was really good.

Beef and Broccoli Stir-fry (serves 5)
20 ounces beef (I used a London Broil cut)
1 tsp minced garlic
1 tsp minced ginger
1 tbsp rice wine vinegar
2 tsp Bragg's aminos
7 cups broccoli florets
1/2 cup stir-fry sauce

Stir-Fry Sauce
I found this recipe in Rocco Despirito's book Now Eat This and modified it to make it PINK appropriate.
1 tbsp. Seasame oil
2 tbsp minced ginger
2 tbsp minced garlic
1/2 cup chopped green onions, white and green parts
1 tbsp arrowroot powder
2-3 tbsp Bragg's aminos
3/4 cup low sodium chicken broth
3 tbsp rice wine vinegar
3 ounces of tomato paste
8 drops stevia or sweetener or your choice
Salt and pepper to taste

Method
Slice the beef into thin strips
Add the garlic, ginger, vinegar and Bragg's to the slice beef and stir to coat the beef. You will want to marinate your beef for at least a few hours in the garlic, ginger, vinegar and Bragg's mixture.

After the beef has marinated for a few hours you will want to make your stir-fry sauce.


Add your chopped garlic, ginger and green onions to a pan that has been misted with olive oil. Saute until you can smell the garlic and ginger and the onions have softened.
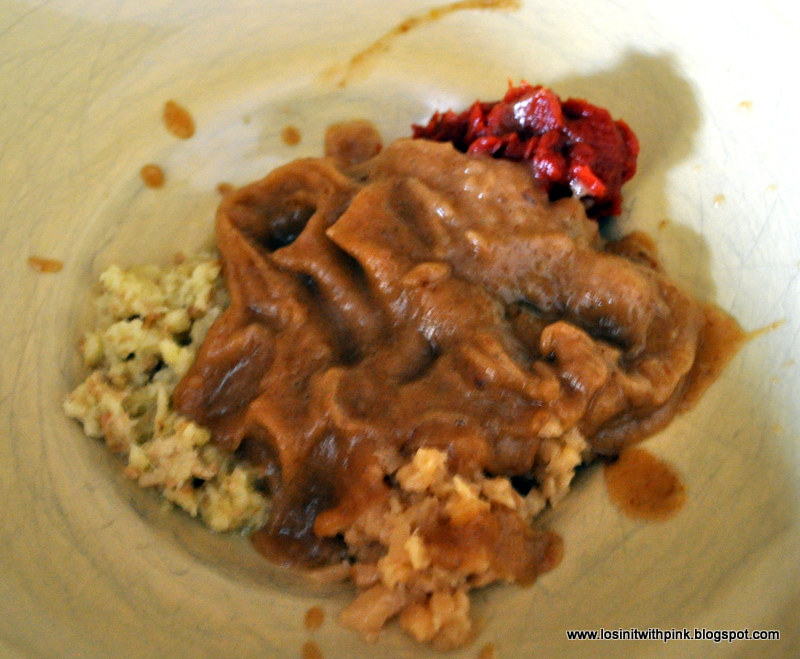
While the the garlic and ginger are cooking add the remaining ingredients for the stir-fry sauce to a bowl and whisk to incorporate any lumps from the arrowroot powder and incorporate the tomato paste.

Add in the liquid mixture you just created to the saute pan with the garlic, ginger and green onions. Cook until the entire mixture has thickened. Take the sauce off the heat and set aside. This will make about 2 cups of sauce, you will not use it all in this recipe so use what you need and save the rest for another meal. It will last in the refrigerator for about a week or you can freeze it to use later.
When the sauce is done, you will saute your marinated beef in a mist of olive oil. If there is a lot of marinade or juice in the beef, be sure to pour it off.
When the beef is browned, add in your broccoli and let cook until the broccoli has softened to your likeness.
When the broccoli is soft, add in about 1/2 cup of the stir fry sauce and stir to combine.

If you like your stir-fry a little more saucy, add in a little more. The 1/2 cup will not make a super saucy stir-fry but the sauce is pretty strong so start with a little and add more if you want.
Serve over brown rice or cauliflower rice and Enjoy!


Saturday, March 17, 2012

Fried "rice"


Have I told you all about my love of Chinese food? Yeah, it pretty much rocks my world. As a matter of fact my first "official" job at the ripe old age of 14 was as a waitress in a Chinese food restaurant. I know that was young to get a job as a waitress but my friend's parent owned the restaurant and I would hang out there all the time and just help out so as soon as I was old enough to legally be employed I had a job. I guess my love of Chinese food runs deep huh?

This recipe is special though because it doesn't actually have rice in it. How do you make fried rice without rice you ask? Well with the most versatile vegetable in the world, cauliflower. Yep cauliflower not only does it make a knock out replacement for potatoes but it also makes a great replacement for rice, let me show you how. 

Fried "Rice" (makes 2 generous meal size servings or 4 side servings)
1/2 head of cauliflower
peas/snap peas (I used both)
carrots
1/4 of an onion
Canadian Bacon or cooked diced chicken (optional, I ate this as a meal so I added in Canadian bacon for my protein but if you are serving this as a side dish, just leave out the protein)
1 egg
dash of almond milk
1/2 tsp minced garlic
green onions or chives
1-2 tbsp of low sodium soy or Bragg's Aminos
Olive oil

Method 
Start by making scrambled eggs by adding a little almond milk to an egg and whisking together.
Ignore my pan, I burnt the crud out of it the other day, it is ugly but still usable
Cook your egg until it is scrambled, then remove from the pan and set a side until later.
Remove the florets from the head of cauliflower and add the florets to the blender or food processor
Pulse until the cauliflower resembles rice
Chop your carrots, green onions, onion, garlic and snap peas if you are using them
Saute them in a mist of olive oil until they begin to soften
When they soften slightly add another mist of olive oil to your pan then add in your cauliflower "rice" and cooked chicken or Canadian bacon
Continue to cook until the cauliflower has softened and cooked through, then add in your scrambled egg and green onions

Stir to combine and then add in your Bragg's or low sodium soy sauce to the mixture. I actually used half and half, 1 tbsp Bragg's 1 tbsp low sodium soy sauce.
Serve and Enjoy!


Tuesday, March 13, 2012

Finished with Phase 2 on to Phase 3

I am finished with phase 2 and start phase 3 today, time to check in and report my progress. First I must say I am having to give myself and attitude adjustment today because I am disappointed in my progress on phase 2. Yes, I lost weight and inches during phase 2 ( 7 lbs. and 5 inches), just not as many as I wanted. I seem to have hit a plateau the last week or so and just can't get past this weight. I have dieted in the past and been successful but I stalled out last time at this exact weight got frustrated and gave up. I am determined that this time I will bust through this plateau and not give up. Hopefully the phase 3 exercises will help with that. I must admit that I also have gotten lacked with my water intake during phase 2 which I am sure contributed to my lower weight loss numbers. I will do this and hopefully I will have bigger numbers to report next time.


Before Reset
After Reset
After Phase 1
After Phase 2
Total loss
Waist
48 inches
45 inches
41.5 inches
40 inches
8 inches
Bust
47 inches
45 inches
42 inches
41 inches
6 inches
Hips
45 inches
44 inches
41.5 inches
41 inches
4 inches
Thigh
27 inches
26 inches
25 inches
23 inches
4 inches
Totals
167 inches
160 inches
150 inches
145 inches
22 inches

Monday, March 12, 2012

Company Worthy Stuffed Chicken Breasts


This is one of those meals that sort of came together with the last of the produce hanging out in my refrigerator. For it being bottom of the barrel, use what you got on hand, it was excellent, even company worthy if I do say so myself. I happen to have a few mushrooms, a few mini bell peppers and 1 yellow squash hanging out in the produce bin but use what you have. If you only have a zucchini use that, no bell pepper, try a carrot. I really would have loved onion in this also but I was all out. Do you get what I'm saying, use what you have.

Company Worthy Stuffed Chicken Breasts
1 boneless skinless chicken breast
3 white mushrooms
3-4 mini bell peppers or half of a large one
1/2 yellow squash
1/4 tsp thyme
1/4 tsp minced garlic
Dash of Balsamic Vinegar
Dash of salt
Dash of pepper

Method


Start by filleting your chicken breast but stop before you cut all the way through. You want to form a pocket of sorts.


Chop your vegetables in your food processor until fairly fine, it will hold together better if it is a fine chop but you certainly don't want a paste.

Saute your vegetables in a mist of olive oil

When they start to soften add in your thyme, garlic, salt, pepper, and balsamic vinegar and let cook a minute or so longer just so the flavors meld

Take your filling and stuff your chicken where you created your pocket

Fold over your chicken so that the stuffing is sandwiched between your chicken

Return the stuffed chicken breast to the pan and saute until both sides are lightly brown (I totally got busy helping with homework and burned the snot out of my pan but the chicken was saved, just a little more brown than most people like)

Then place in a oven safe dish and finish baking your chicken breast in the oven at 375 degrees for about 15 minutes. I also added some brussel sprouts to my pan with a dash of balsamic vinegar and allowed them to roast right along side my chicken.

Remove from the oven and enjoy!


Thursday, March 8, 2012

Sweet and Sour Chicken


I must confess,  I made this for dinner the other night and didn't think it would turn out so I didn't bother taking pictures until after it was complete. I tasted it and ended up kicking myself for not taking the step by step photos of the recipe. Lesson learned and things turned out okay since  I ended up liking it so much, I made it again the next day minus the quinoa for my lunch and took the pictures then.

I must note that this recipe has arrowroot powder which is a thickening agent. It is not listed in the PINK method book as an accepted item, I however did ask Cynthia about it when I used it in this alfredo recipe and she said that it was fine to use as a thickening agent.

Sweet and Sour Chicken
2 tbsp tomato paste, no added sugar
1 tbsp Bragg's Aminos or low sodium soy sauce
1/2 tsp arrowroot powder
1/4 cup white vinegar
1.4 cup water
1-2 medjool dates pitted
8 ounces boneless skinless chicken breasts cut into chunks
2 cups assorted vegetables chopped (I used mushrooms, zucchini, peppers, onions, carrots)

Method
Start by browning your chicken until cooked through

While your chicken is cooking make your sweet and sour sauce.

Add the tomato paste, Bragg's, Vinegar, Arrowroot powder, water and dates to your blender and blend until smooth.

Note: You may want to chop your dates first, I added my pitted dates whole into the blender and they didn't chop very well. Everything worked out once I cooked the sauce because the dates just kind of dissolved when heated.

Once the chicken is cooked add your vegetables and saute until they are soft.

When the vegetables are soft, Pour your sauce into the pan and let cook until it thickens. It shouldn't take very long.

Taste your sauce, I ended up adding just a dash more Bragg's to mine but I didn't want you all to try it and get overwhelmed by the taste so you be the judge.
Note: this picture was my husband's meal,  it has pineapple added, I don't think pineapple is PINK approved , at least it isn't listed as a slow fruit,  so just leave it out and you should be sitting PINK

Serve over quinoa or brown rice.

Enjoy

Related Posts Plugin for WordPress, Blogger...